
Mastering Real-time Data Streaming Game with Webhooks in Zeeve Subgraph
Subgraphs have already proved to be a game-changer for web3 data indexing. A range of applications spanning gaming, NFTs, DeFi, and institutional platforms have been using their own custom subgraphs for retrieving highly specific data. In our previous articles, we have had in-depth discussions about Subgraph in blockchain, its use cases, deployment walkthroughs, and more. In today’s article, let’s learn about a new and highly useful feature– ‘Webhooks,’ which are now supported on Zeeve Subgraphs and are enabling next-level real-time data streaming ‘Webhooks.’

What are Webhooks in Subgraph?
Subgraphs Webhooks is an exciting and very useful feature that allows applications to receive web3 data in real-time, parallel with the indexed data. Webhooks get triggered upon every entity change in the Subgraph, and it updates the corresponding results immediately. By doing this, webhooks allow subgraphs to push and sync real-time data to databases, allowing the applications to perform important operations like code execution or updating a backend. Webhooks are designed to function in line with your subgraphs, eliminating the need to manage a separate infrastructure or invest resources in a different Subgraph.
Speaking about the benefits, webhooks in subgraphs allow you to securely stream real-time web3 data, trigger even minor changes in the entity, and keep the data flowing on your application. Many subgraph providers, including Zeeve, are now offering webhooks for each of their projects, improving the data flow for a variety of applications. Having access to real-time data is useful for all kinds of applications, be they high- or medium-traction applications. However, note that if you want to track an immutable entity, then subgraph webhooks won’t work in that case, meaning that it won’t update real-time data.
How Subgraph-driven Webhooks work?
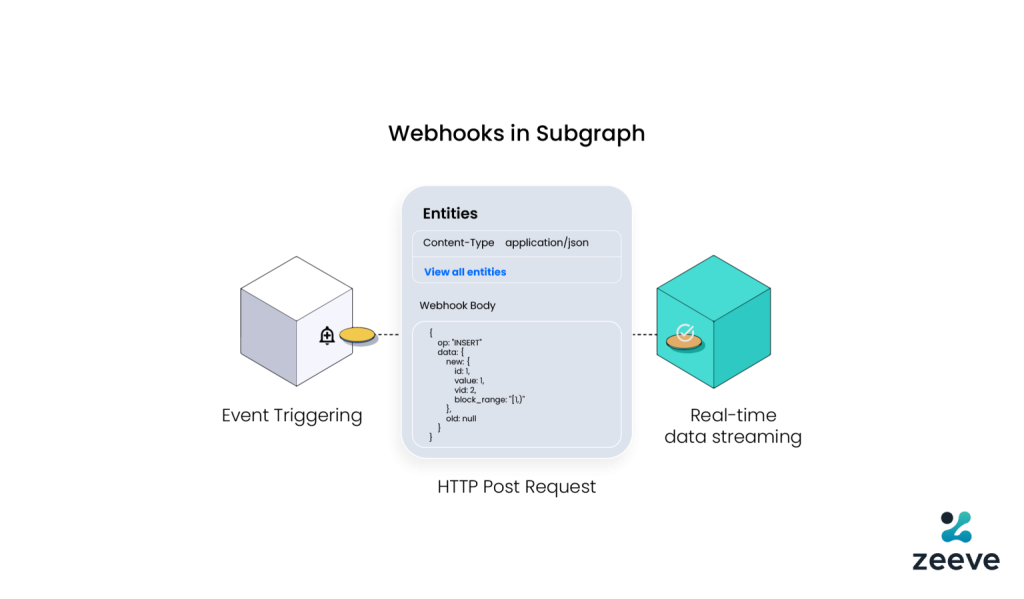
Webhooks in Subgraph work by sending real-time data results via HTTP Post requests for all the entities in which you have enabled webhooks. So, if a subgraph handler executes a call method like entity.save(), an update is reflected to the intermediate database powering the underlying subgraph API. A real-time watcher then interprets this update and puts it to the webhook handler while enabling a few important operations like UPDATE, INSERT, or DELETE. A Subgraph can store different versions of entities with their block_range column, enabling you to understand the difference between the true entity change or changes occurring due to the reorganization of the blockchain.
How to create subgraph webhooks for real-time data streaming?
There are two main ways to create webhooks for subgraph– either through the traditional programming method or the low-code approach, which is possible through Zeeve’s Traceye. We will discuss both the methods here:
Option-1: The programming way
To create subgraph webhooks via programming, you will need deployed subgraph(s) for your project, as well as a fully-functioning webhook handler. Following is the step-by-step process to create webhooks:
- At first, you need to deploy one or more subgraphs, as required for your project. Refer to this detailed guide on custom subgraph deployment.
- Next, create the webhook handler.Creating a handler from scratch is a complex process. However, for the testing purpose, you can use pre-built webhook handlers like webhook.site.
- Now, create your webhook to receive real-time data on your subgraph. Below is an example of command that represents webhook creation for a gaming subgraph:
subgraph webhook create gaming/v1 --name gaming-event-webhook --entity event --url https://webhook.site/<ANOTHER-UNIQUE-WEBHOOK-URL>
✔ Creating webhook

Webhook 'gaming-event-webhook' created.- Testing your webhook is the final step that you can do by inspecting the custom handler or the webhook.site URL, whichever is applicable for your setup. Your webhook should stream real-time data seamlessly. If not, additional modifications are required on it.
As you can see, this approach involves creating a webhook handler, webhook itself, and then testing– all through programming. This can be complex and resource-intensive at the same time. As an alternative to this, let’s discuss the second option; a low-code approach.
Option-2: The Low-code, hassle-free way
You can opt for the low-code approach offered in Zeeve’s Traceye; a one-click subgraph deployment and management platform, now supporting no-code creation of webhook. Here’s is the step-by-step process:
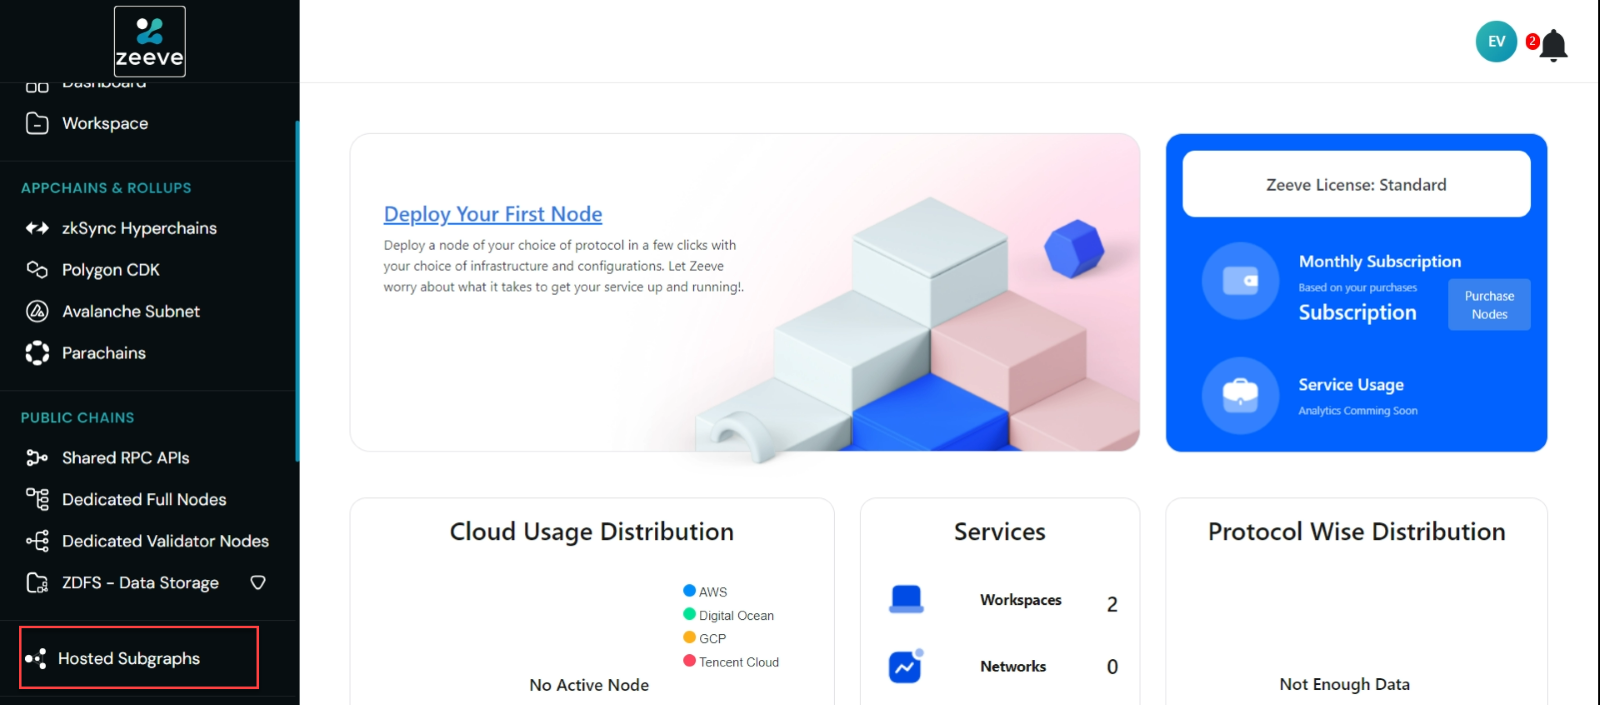
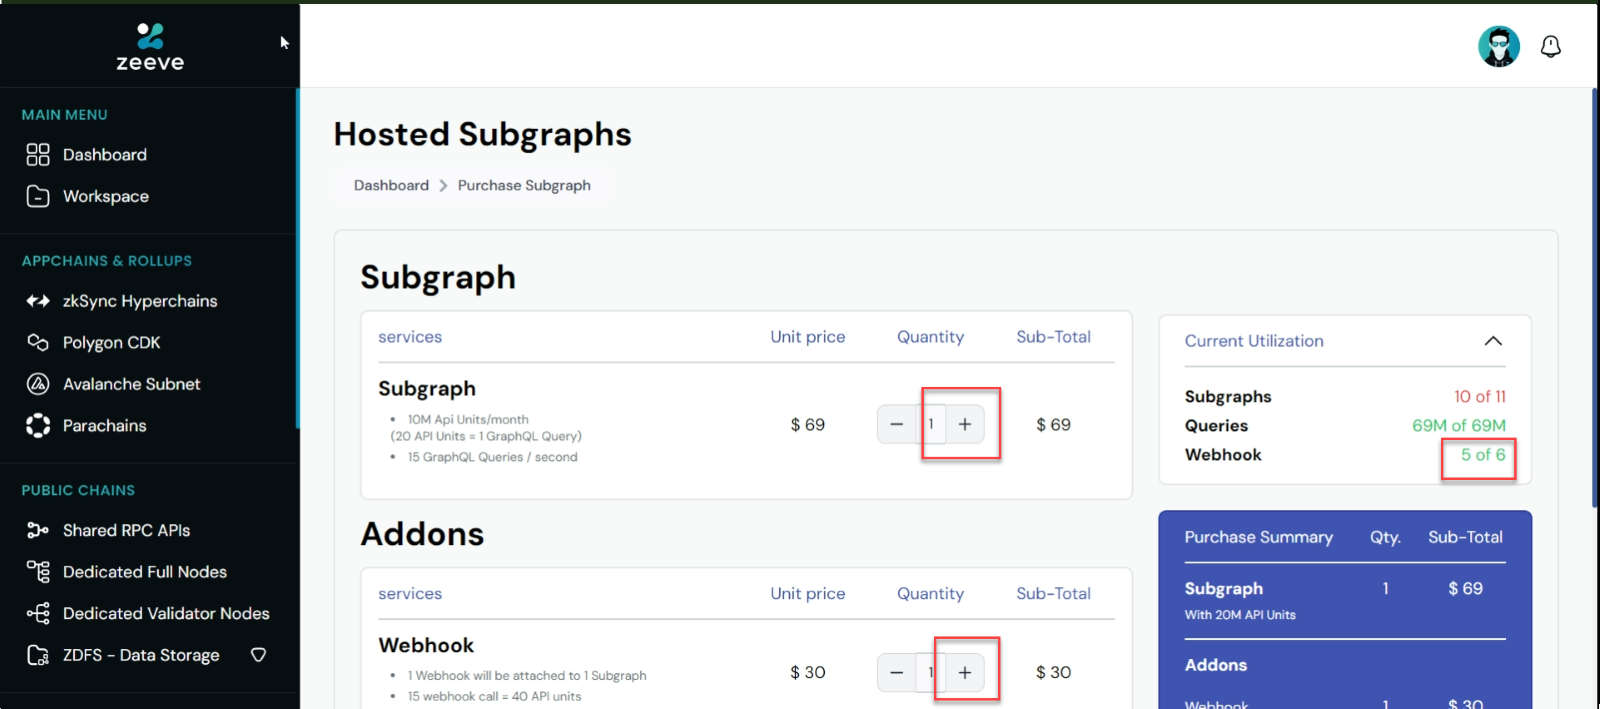
Step:1 To deploy your subgraph or to activate webhooks, you first need to buy subgraphs and webhook add ons. For this,, navigate to ‘Hosted Subgraph’ located at the left panel.
Step:2 Proceed with the ‘Buy Subgraph’ option.
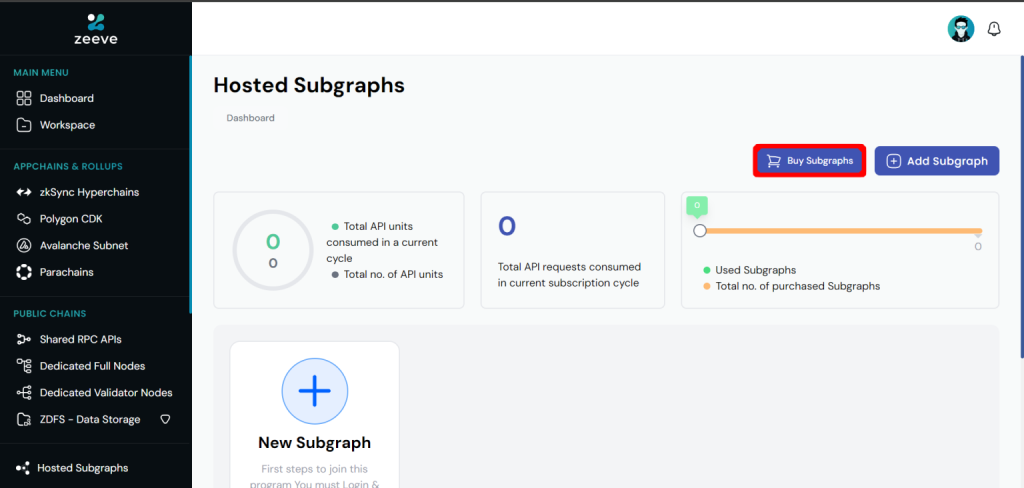
As you can see, it will give you the option for webhook addons. Select your preferred quantity and complete the payment process to be able to deploy your Subgraph. Now, click on webhook to enable them.
Step:3 Start deploying your subgraph on Zeeve’s Traceye. It facilitates a quick, one-click deployment of all your subgraphs and manages them on a highly-optimized, enterprise-grade infrastructure. Refer to the guide linked below for step-by-step process: How to deploy Subgraphs with Zeeve?
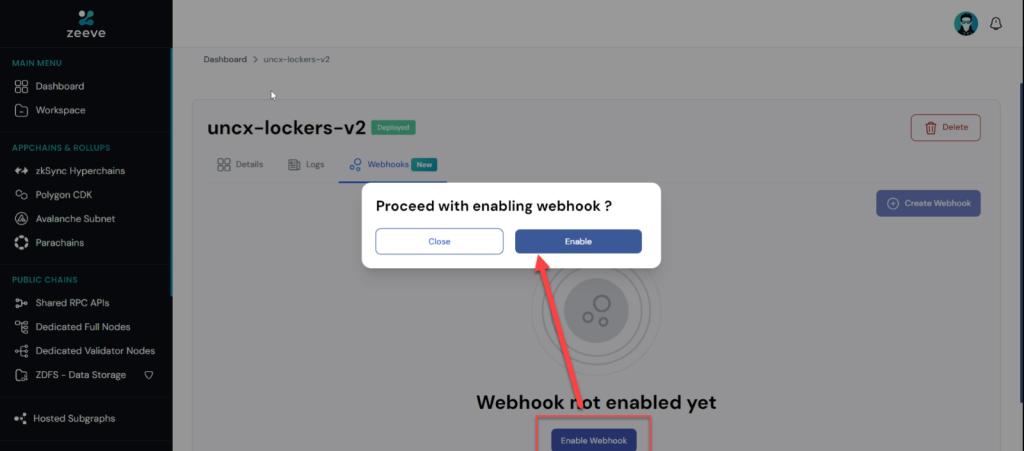
Step:4 Go to your deployed subgraph and click on webhook to enable them.
A new page will appear, asking you to enter Sugraph entities and the webhook URL.
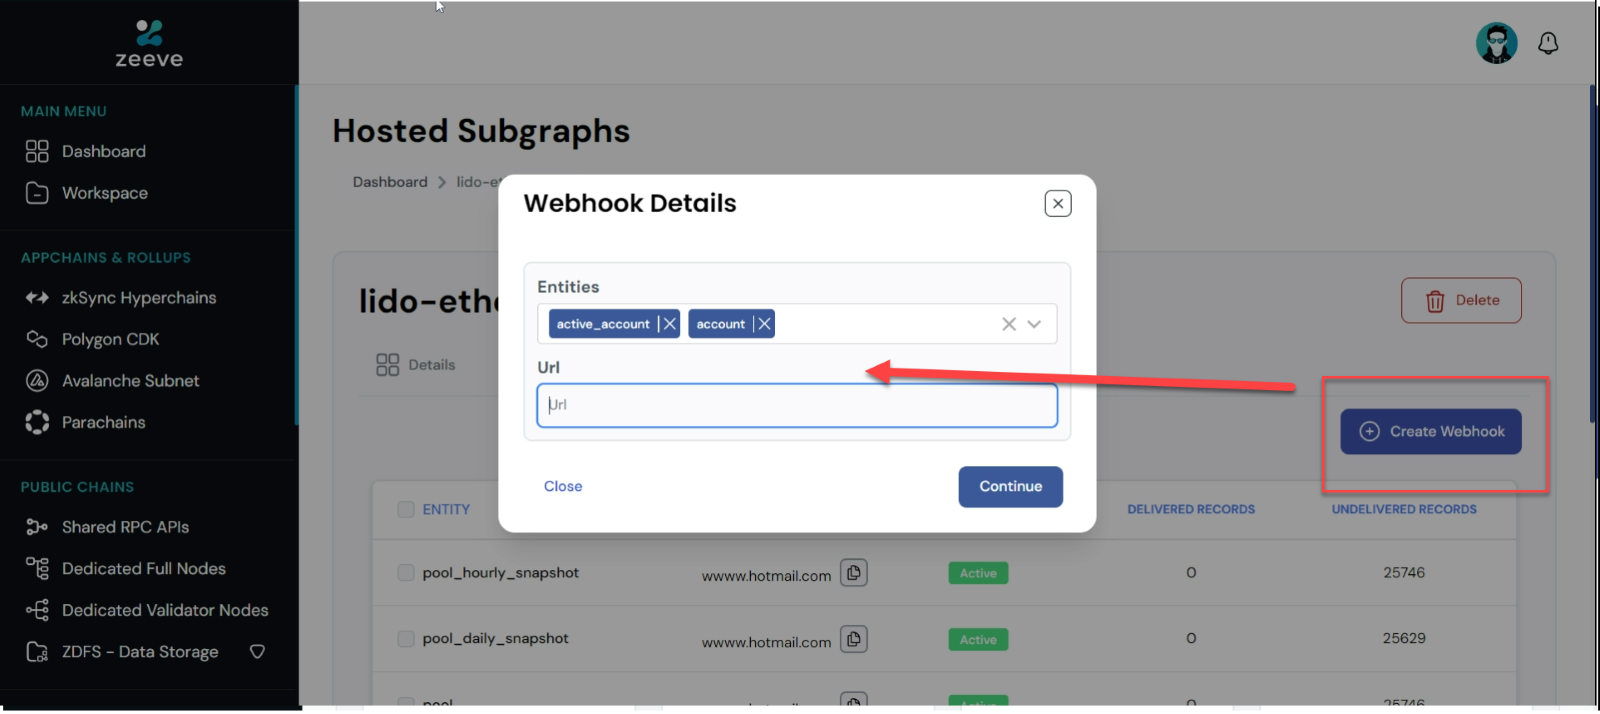
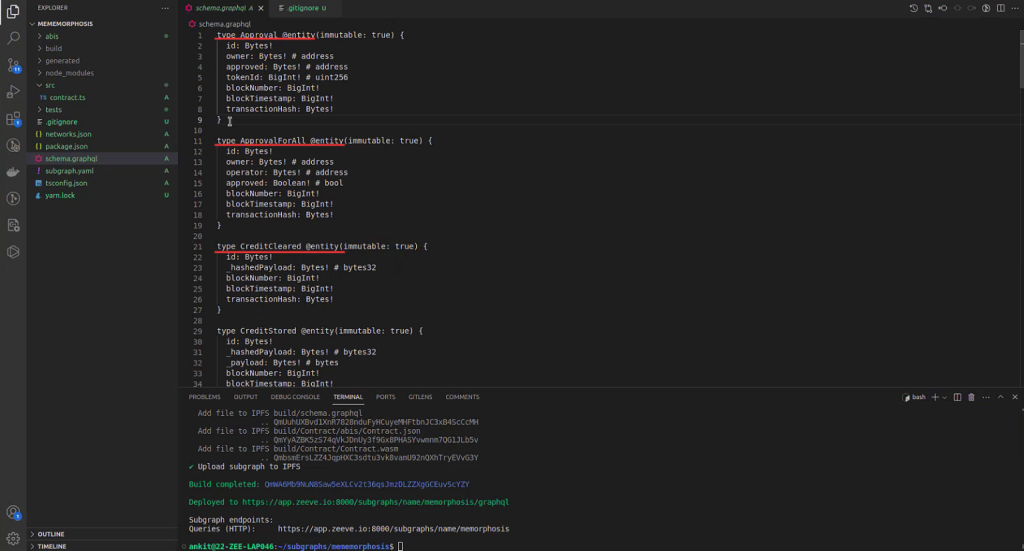
Step:5 Add Webhook URL and entities of your subgraph. Webhook URL is a post url that will receive the real-time data. You can easily create this url by using services like Webhook.site, Webhook Tester, and TypedWebhook.tools. Regarding entities, these represent the table you create in the GraphQL schema. For example, the first table in the below image has ‘Approval’ as entity, second one has ‘ApprovalForAll’, and the third has ‘Creditcleared’. Similarly, you can add entities from your subgraph schema.
After adding the details, click on continue and your Subgraph webhooks will be created and it will start streaming real-time data right away.
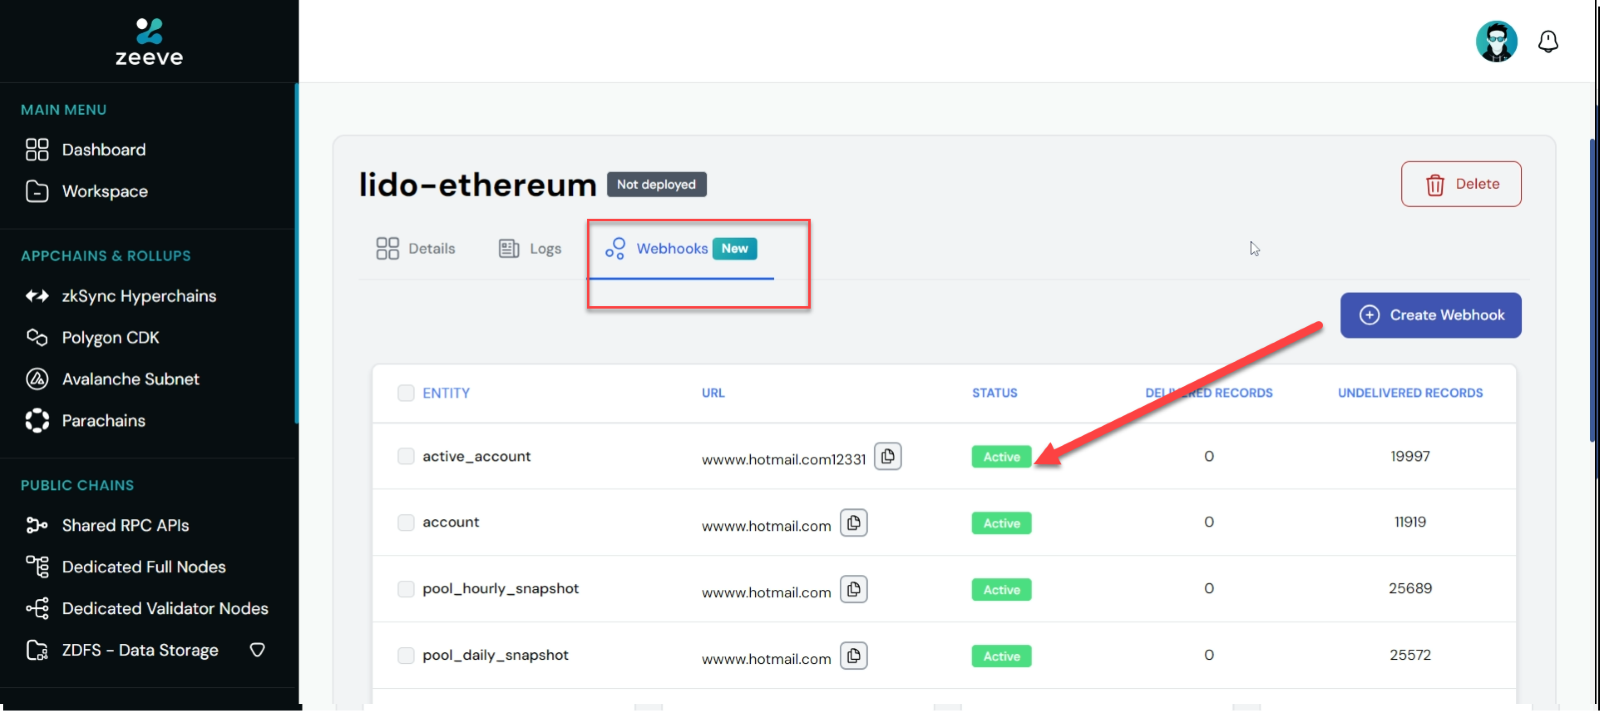
Step:6 Navigate to Webhooks, and you will see a tabular dashboard that records all the information about your webhooks, such as Entity, URL, Webhook Status, Delivered records, and Undelivered records. This helps you to keep a track of how your webhooks perform and if there’s an issue that needs to be fixed.
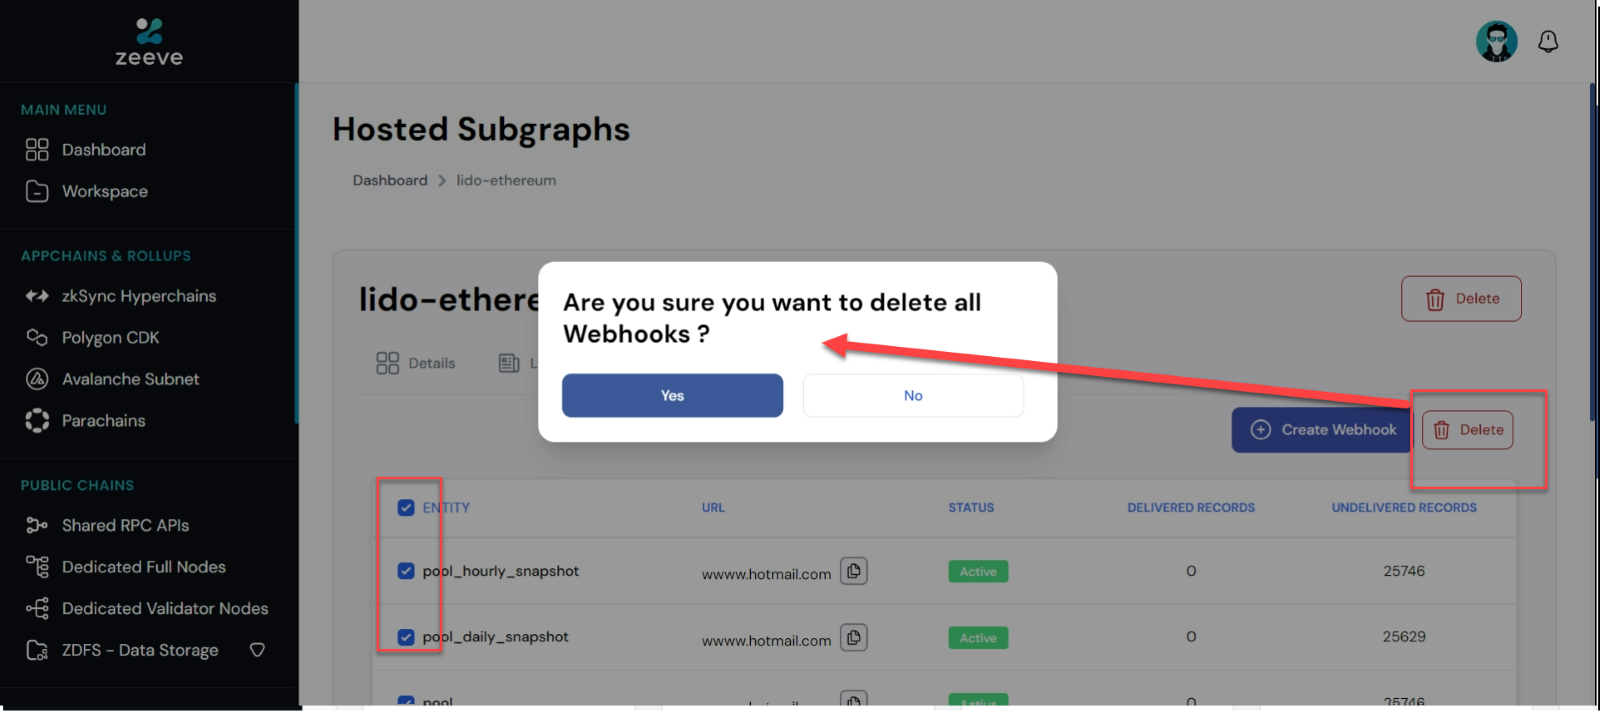
Further, the Zeeve Subgraph webhook gives you the flexibility to delete your webhooks in just one click. From the same page showing information about your webhooks, select all the entities you want to delete and click ‘Delete’. Continue with yes, and your webhooks will be deleted successfully.
We have successfully enabled webhooks in subgraph. As we can see, it was quick, simple, and did not require writing even a single line of code. Everyone, whether having technical skills or not– they can deploy subgraph and enable webhook with Zeeve without any complexity and at significantly lower cost, resulting in faster time to market.
Conclusion
Webhooks in Subgraph is a relatively new concept, which is getting traction because of its exciting capabilities of streaming real-time blockchain data, thereby simplifying the web3 application development and the experience for end users. Knowing this, Zeeve Traceye started supporting the webhook feature, and now it is open available for anyone to use.
Further, if you want, Zeeve offers to create a custom subgraph from scratch that will cater to the specific data needs of your project. Contact us for more details about how Zeeve subgraph service will benefit your web3 application and what all blockchain-related services Zeeve offers. If you have any queries, you can drop them on this page, or for a detailed discussion, schedule a call with us.

Responses